Time Series Storage
Create an Edge Xpert Application Service that will export the data to a local time series database (InfluxDB).
Note
The default docker-compose files (located at /etc/config) set the InfluxDB security token as “custom-token”. Of course this can be overridden, but for simplicity, this tutorial uses this default token setting
Edge Xpert Manager UI
- In a web browser, navigate to http://localhost:9090
- Navigate to the App Services page
- Use the Application Service onboarding wizard to create the export to InfluxDB:
- Select Add App Service
 and use the following settings. Any fields not mentioned below should be left blank/default
- Select Add App Service
| Field | Value |
|---|---|
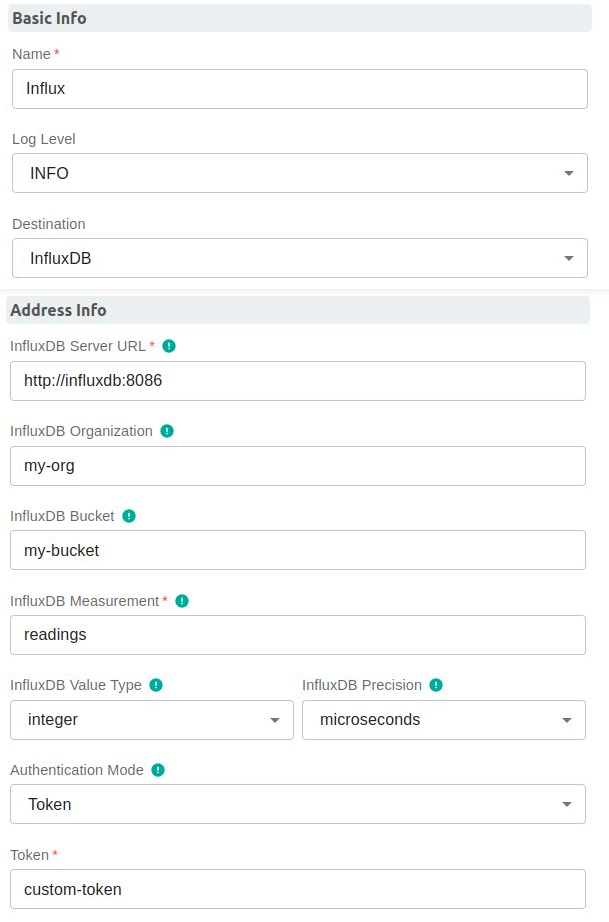
| Name | Influx |
| Destination | InfluxDB |
| InfluxDBServerURL | http://influxdb:8086 |
| InfluxDBOrganization | my-org |
| InfluxDBBucket | my-bucket |
| InfluxDBMeasurements | readings |
| InfluxDBValueType | integer |
| Authentication Mode | Token |
| Token | custom-token |
- See the screenshot from the Edge Xpert Manager below:
- Select Save to create the Application Service
Command Line
As an alternative to using the Edge Xpert Manager UI, the above configuration can also be defined via an Application Service configuration file which can be started via command line. The tutorial project includes an influx.toml file with the same configuration as described above. It can be started as follows:
edgexpert up app-service -p influx.toml
Verifying Data Flow
The next step in the tutorial shows how to view the data via a Grafana dashboard, but if desired, the user can first execute an Influx command to verify that the data is correctly flowing to Influx:
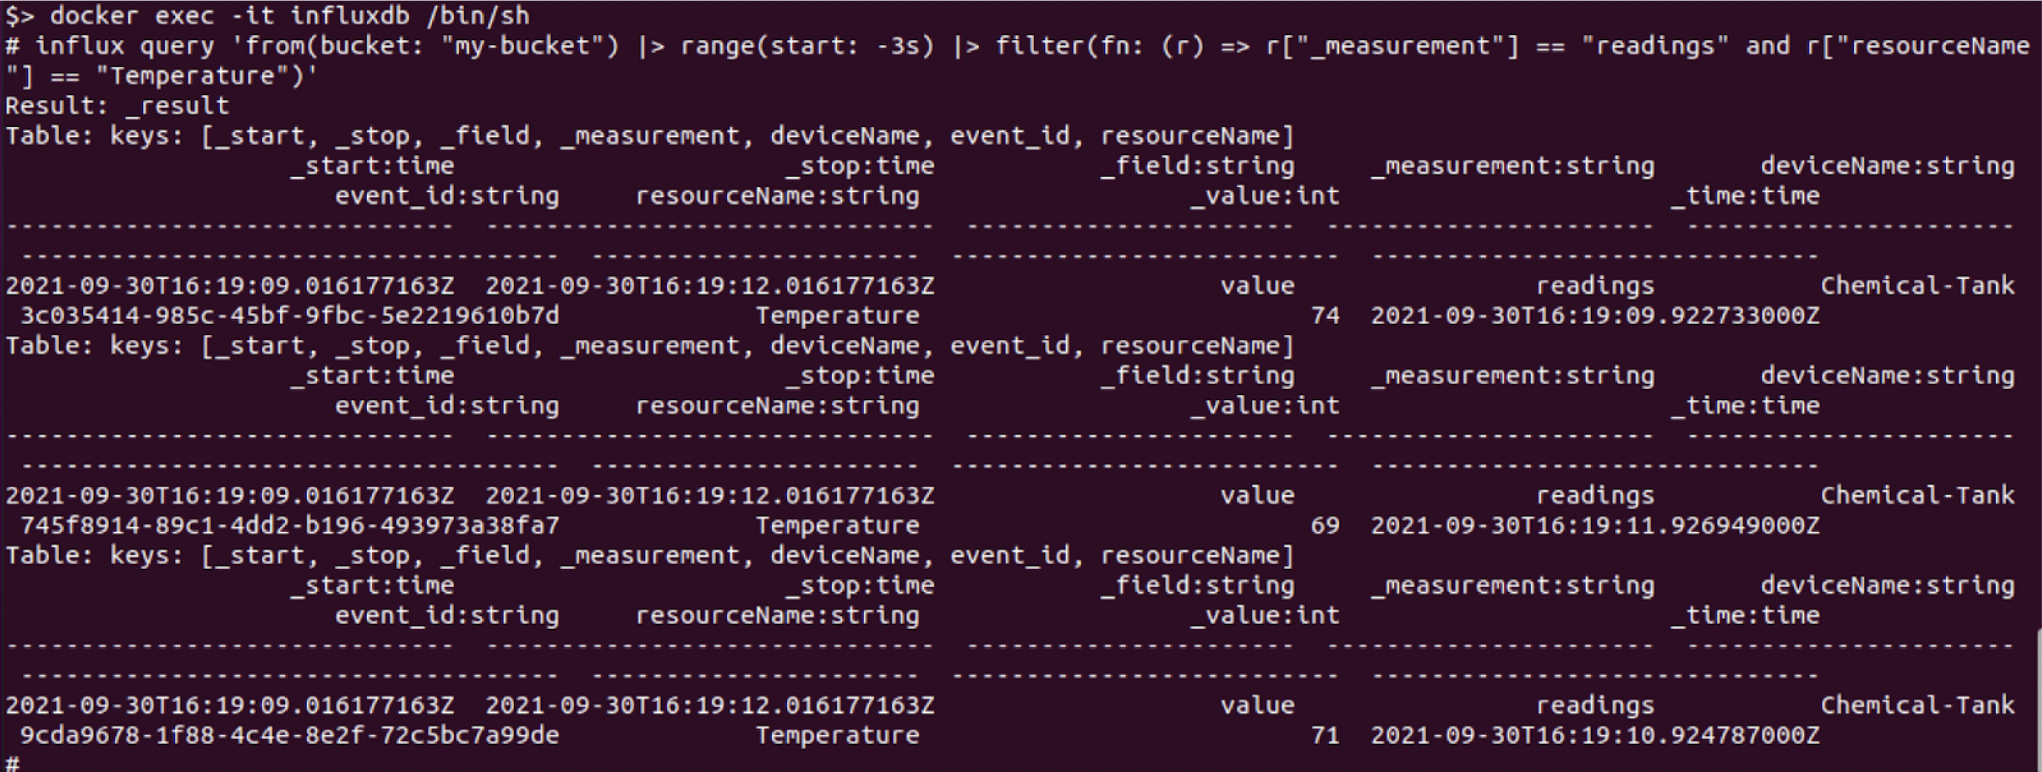
Optional: You can see if the data is arriving in Influx by executing into the influxdb container:
docker exec -it influxdb /bin/sh
and then run the influx query command:
influx query 'from(bucket: "my-bucket") |> range(start: -3s) |> filter(fn: (r) => r["_measurement"] == "readings" and r["resourceName"] == "Temperature")'