OPC-UA Browse Service
Browse Service Overview
The Browse Service capability of the OPC-UA Device Service utilizes the BrowseName attributes of an OPC-UA Address Space and can help the user to describe nodes in device profiles in a more generic and reusable manner.
By specifying the browse path and a known root node from which to start browsing, the Device Service is able to navigate the OPC-UA Address Space to the required node and access its data as if the node was defined explicitly.
This feature is enabled by adding the following attributes to an OPC UA device resource:
| Attribute | Description |
|---|---|
browsePath |
Path from the root node to the desired node |
browsePathNamespaceIndex |
The namespace index of the node in the OPC-UA server |
browseStartNodeId |
Information on the root node. Must contain the identifier, identifierType and namespace index. Note this information can also be passed to the device onboarding call via the OPC-UA RootNode protocol property |
Adding a node without knowing the NodeId
When using the Browse feature, it is not necessary to know or specify the identifier of individual nodes in a device profile, as long as the details of the starting node is known.
As an example, consider the Counter Simulation node from the Prosys OPC-UA Server that is defined as follows:
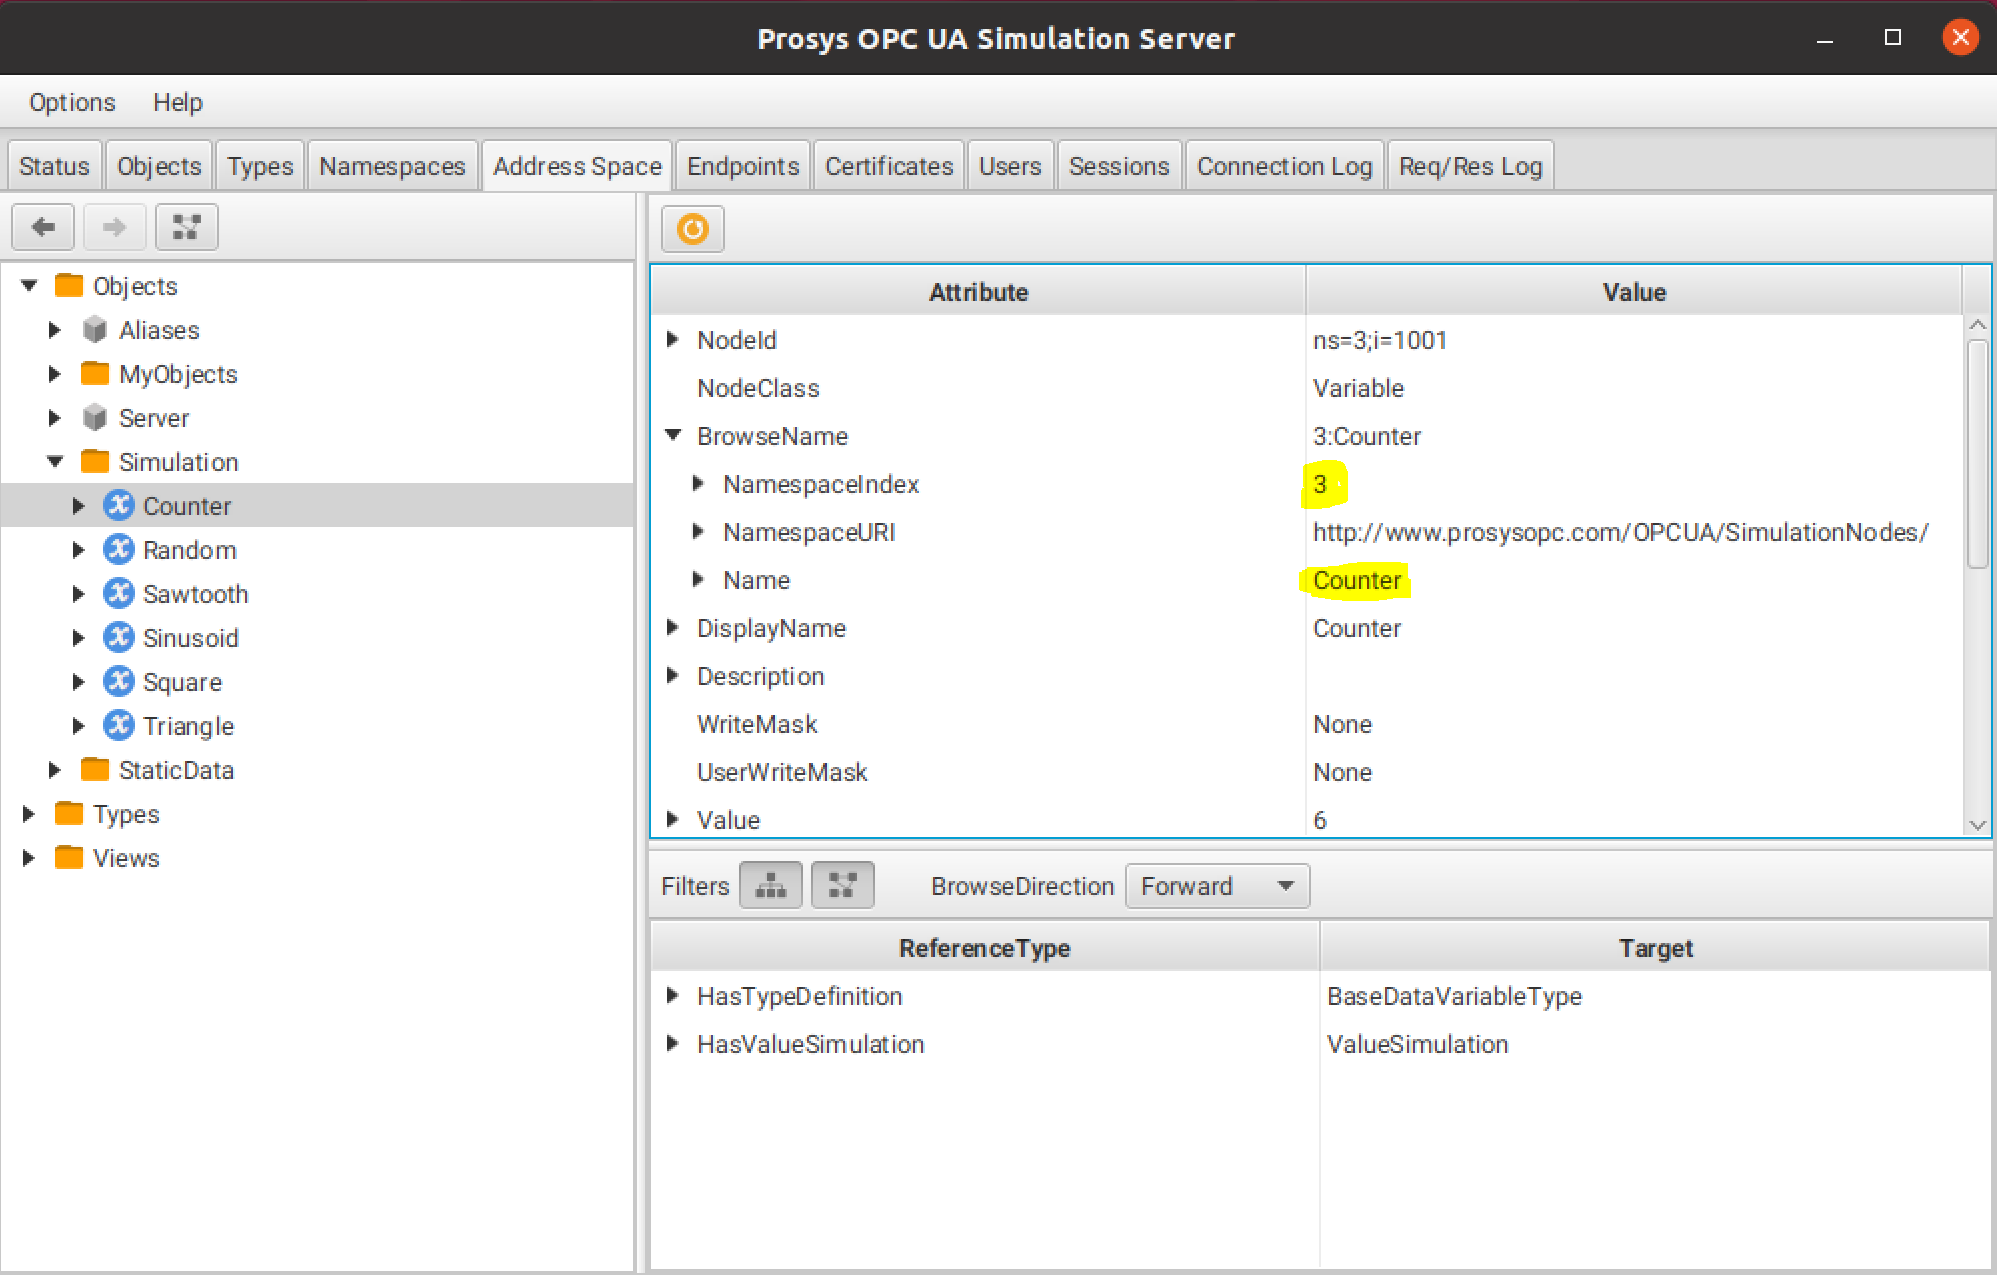
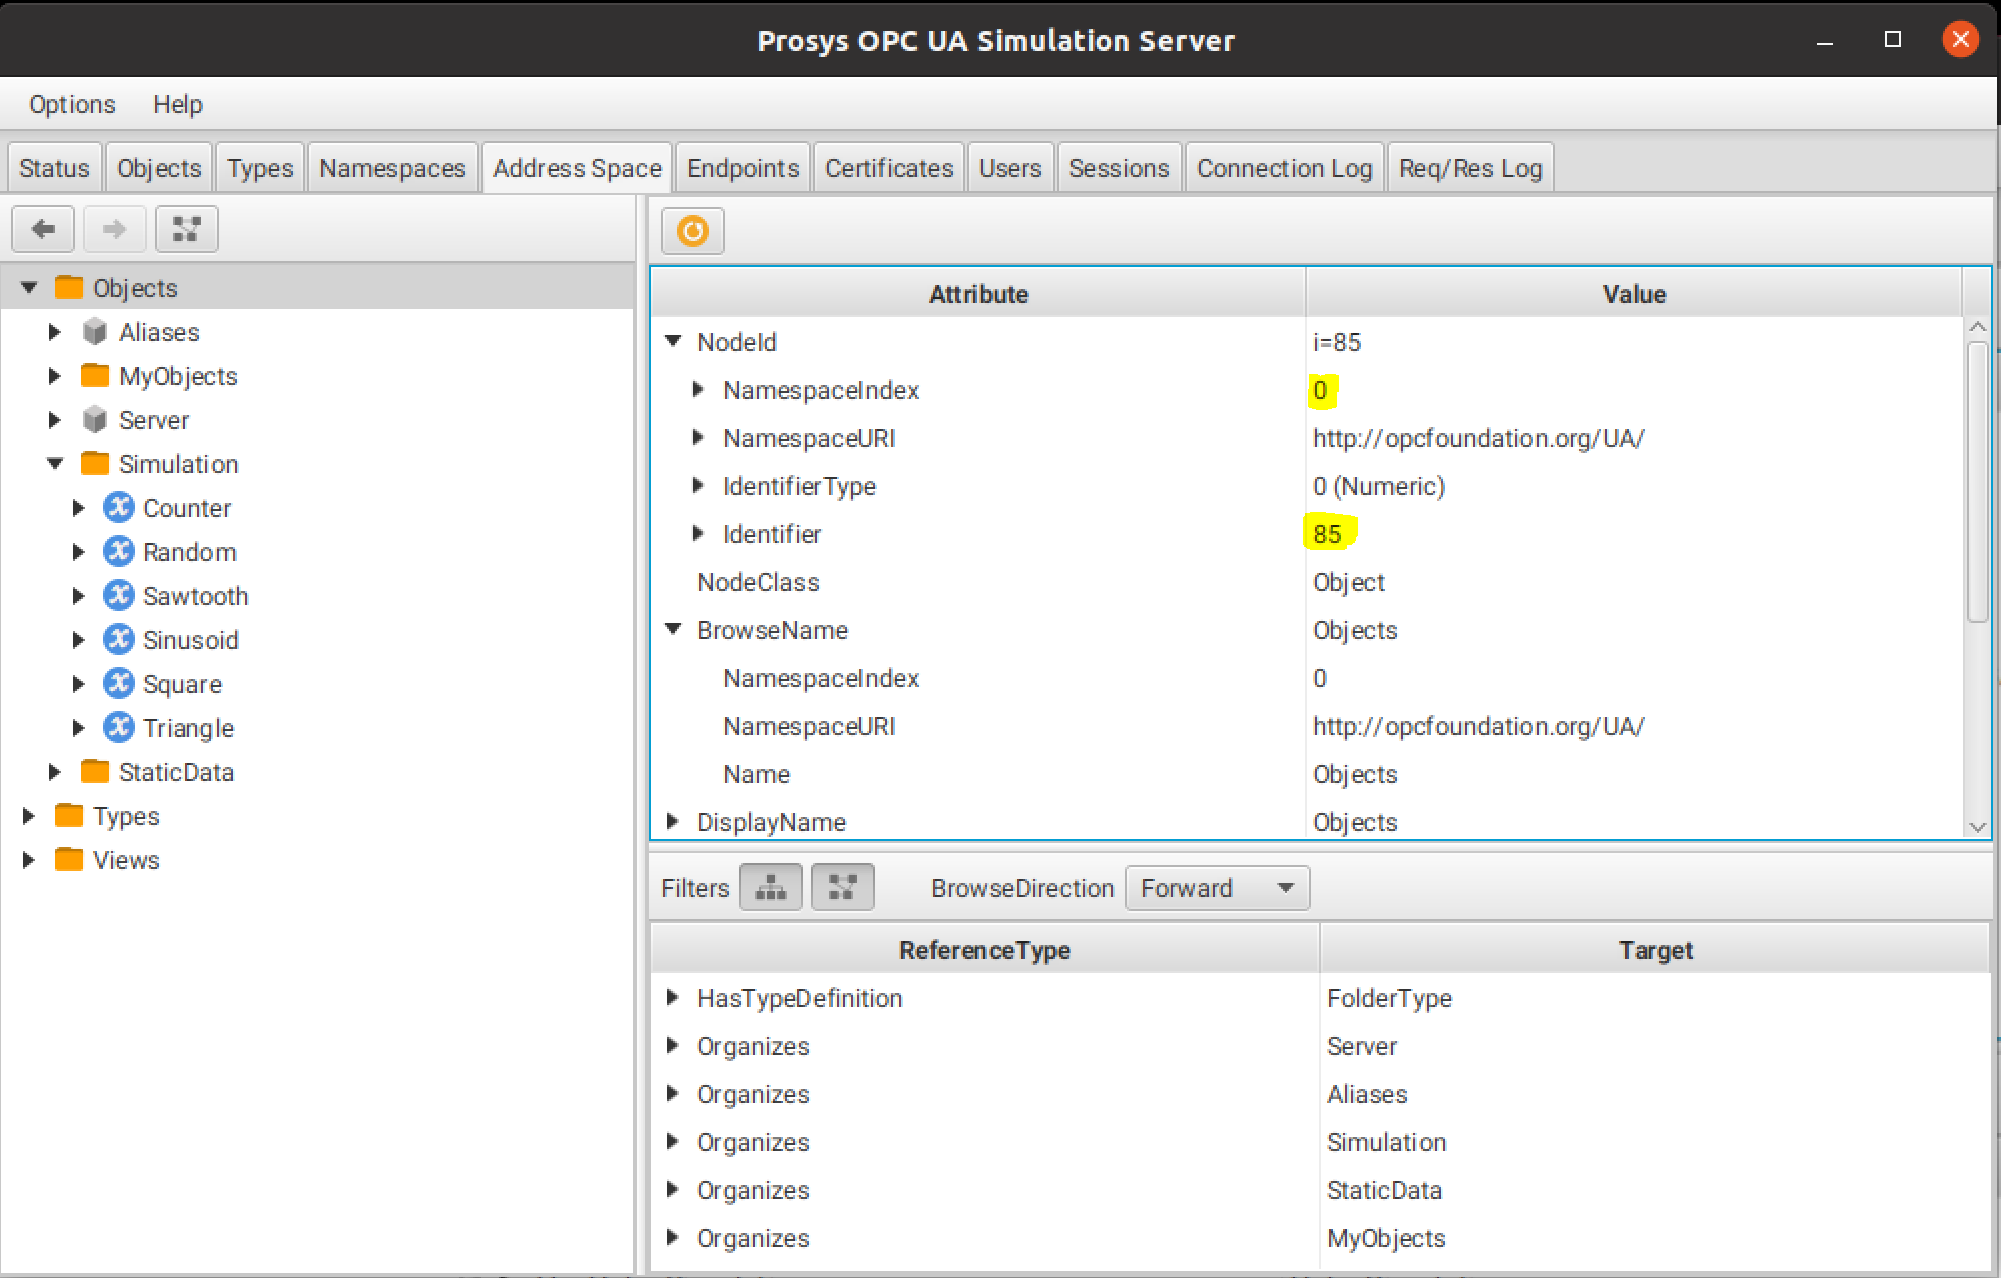
Rather than specify the nodeId in the device profile, we can instead set the browse attributes to include the browse path information from a known parent node. For example, the "Simulation/Counter" browse path could be navigated from the 'Objects' node which is defined as follows:
Given the above information, an example device profile for Counter1 that does not specify its nodeId is shown below. Note how browsePath, browsePathNamespaceIndex and browseStartNodeId are used as an alternative to nodeId:
name: opc-ua-sim-profile
deviceResources:
- name: Counter1
  isHidden: false
  properties:
    valueType: UInt32
    readWrite: R
    units: String
    defaultValue: '0'
  attributes:
    dataTypeId:
      identifier: 7
      identifierType: NUMERIC
      namespaceIndex: 0
    nodeAttribute: value
    browsePath: Simulation/Counter
    browsePathNamespaceIndex: 3
    browseStartNodeId:
      identifier: 85
      identifierType: NUMERIC
      namespaceIndex: 0
Note
Before running this example, please check the above settings exactly match those in your installed version of Prosys.
Modelling multiple nodes of the same type
In some OPC-UA systems, there will be multiple devices that will each be based on the same physical object.
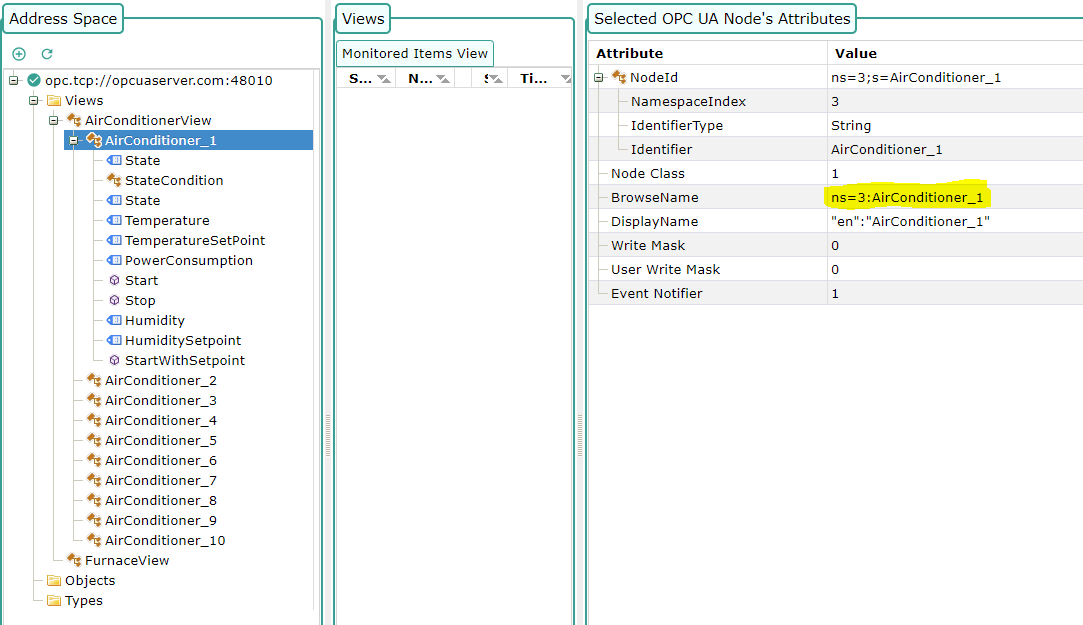
As an example, consider the multiple AirConditioner nodes (AirConditioner_1, AirConditioner_2, etc) that exist in the One-Way Automation example:
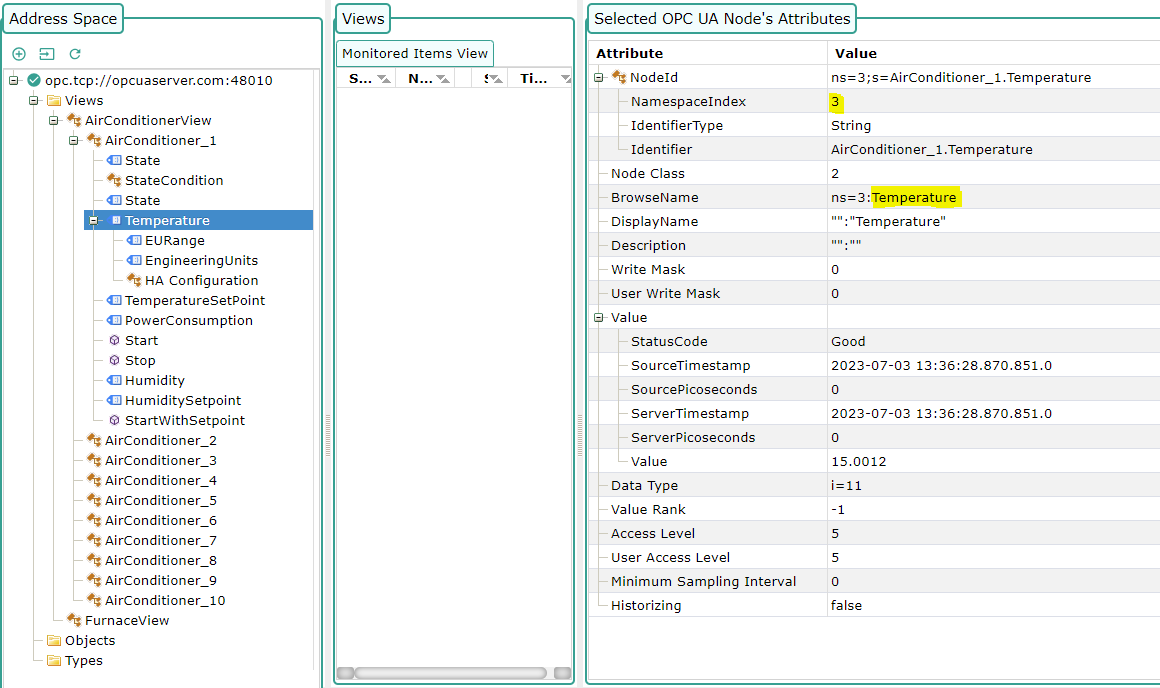
Each AirConditioner node contains exactly the same device attributes (Temperature, State, Humidity, etc):
In this case it may be desirable to create a single generic device profile that can be used to onboard each AirConditioner device. This is possible by specifying the generic properties in the device profile as follows:
name: AirConditioner
deviceResources:
  - name: Temperature
    isHidden: false
    properties:
      valueType: Float64
      readWrite: R
      units: String
      defaultValue: "0"
    attributes:
      dataTypeId:
        identifier: 11
        identifierType: NUMERIC
        namespaceIndex: 0
      nodeAttribute: value
      browsePath : Temperature
      browsePathNamespaceIndex : 3
  - name: Humidity
    isHidden: false
    properties:
      valueType: Float64
      readWrite: R
      units: String
      defaultValue: "0"
    attributes:
      dataTypeId:
        identifier: 11
        identifierType: NUMERIC
        namespaceIndex: 0
      nodeAttribute: value
      browsePath : Humidity
      browsePathNamespaceIndex : 3
Then onboard each device by referring to the generic profile but specifying an individual RootNode to browse to that device.
First upload the above device profile (saved locally as airconditioner.yaml):
curl http://localhost:59881/api/v2/deviceprofile/uploadfile -F "file=@airconditioner.yaml"
Then onboard AirConditioner1 by specifying the information for the AirConditioner_1 node:
curl -X 'POST' \
  'http://localhost:59881/api/v2/device' \
  -H 'Content-Type: application/json' \
  -d '[
  {
    "apiVersion": "v2",
    "device": {
      "name": "AirConditioner1",
      "adminState": "UNLOCKED",
      "operatingState": "UP",
      "protocols": {
        "OPC-UA": {
          "Address":"opcuaserver.com:48010",
          "RootNode": "ns=3;s=AirConditioner_1"
        }
      },
      "serviceName": "device-opc-ua",
      "protocolName": "opc-ua",
      "profileName": "AirConditioner"
    }
  }
]'
The Temperature property of AirConditioner1 could then be accessed as follows:
curl http://localhost:59882/api/v2/device/name/AirConditioner1/Temperature
A device named "AirConditioner2", for example, would be onboarded by specifying RootNode as "ns=3;s=AirConditioner_2" and so on.